Transforming this Picture
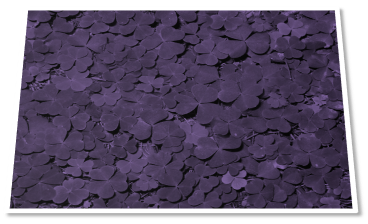
Now that both basic properties and additional picture properties have been specified, we can begin incorporating shape properties. Below is the same picture as described above, with 3D camera perspective applied along with a simple shadow and a white outline. These shape properties are the same that can be applied to a shape element. One picture-specific difference can be seen here with the border around the picture. Instead of the border growing both inward and outward, it only grows outward.
<p:pic>
  <p:nvPicPr>
    <p:cNvPr id="4" name="St_Patrick's_Day.jpg"
      descr="This is a Saint Patrick's day picture"/>
    <p:cNvPicPr>
      <a:picLocks noChangeAspect="1"/>
    </p:cNvPicPr>
    <p:nvPr/>
  </p:nvPicPr>
  <p:blipFill>
    <a:blip r:embed="rId2">
      <a:duotone>
        <a:srgbClr val="000000"/>
        <a:schemeClr val="accent4"/>
      </a:duotone>
    </a:blip>
    <a:stretch>
      <a:fillRect/>
    </a:stretch>
  </p:blipFill>
  <p:spPr>
    <a:xfrm>
      <a:off x="1346200" y="914400"/>
      <a:ext cx="3657600" cy="2743200"/>
    </a:xfrm>
    <a:prstGeom prst="rect">
      <a:avLst/>
    </a:prstGeom>
    <a:noFill/>
    <a:ln w="57150">
      <a:solidFill>
      <a:schemeClr val="bg1"/>
      </a:solidFill>
    </a:ln>
    <a:effectLst>
      <a:outerShdw blurRad="50800" dist="50800" dir="2700000" algn="tl"
        rotWithShape="0">
        <a:srgbClr val="7D7D7D">
          <a:alpha val="65000"/>
        </a:srgbClr>
      </a:outerShdw>
    </a:effectLst>
    <a:scene3d>
      <a:camera prst="perspectiveRelaxedModerately"/>
      <a:lightRig rig="threePt" dir="t">
        <a:rot lat="0" lon="0" rev="18900000"/>
      </a:lightRig>
    </a:scene3d>
  </p:spPr>
</p:pic>